Inkfox AI logoInkfox AIInkfoxAI
HomeGallery
Up to 33%Pricing
  • Home
  • Image
    • Text to Image
    • Image to Image
    • Background Remover
    • Image Upscaler
    • Merge Images
    • Background Changer
    • Photo Restoration
    • Watermark Remover
    • Virtual Try On Glasses
    • Virtual Try On Sunglasses
    • Logo Generator
    • Anime Generator
    • Coloring Page
    • Headshot Generator
    • Sticker Generator
    • Product Photo
  • Video
    • Text to Video
    • Image to Video
    • Video to Video
    • Old Photo Video
    • Hug Video
    • Product Video
    • Kiss Video
    • Wedding Video
    • Real Estate Video
    • Food Video
    • Travel Video
    • Portrait Video
    • Baby Dance Video
  • Models
    • Inkfox AI Basic
    • Inkfox AI Pro
    • Inkfox AI Max
    • GPT Image 2.0
    • Nano Banana 2.0
    • Nano Banana
    • Seedream 4.0
    • Seedream 4.5
    • Seedream 5 Lite
    • GPT Image 1.5
    • Z-Image
    • Flux 2 Pro
    • Wan 2.7 Image Pro
    • Inkfox AI Pro
    • Inkfox AI Max
    • HappyHorse 1.0
    • Seedance 2.0
    • Gemini Omni
    • Grok Imagine 1.5
    • Grok Imagine
    • Veo 3.1
    • Kling 3.0
    • Runway
    • Hailuo 02
    • Wan 2.7
    • Hailuo 2.3
    • Seedance v1
    • Kling 2.6
    • Wan 2.6
  • Gallery
  • Pricing
  • Blog
    Guides and launch notes
    Feature Requests
    Vote on what ships next
    FAQ
    Usage, pricing, and account answers
Inkfox AI logoInkfox AIInkfoxAI
How to Turn a Photo Into a Sticker With AI (Free Die-Cut Stickers)
2026/06/09

How to Turn a Photo Into a Sticker With AI (Free Die-Cut Stickers)

Learn how to turn a photo into a sticker with free AI. Pick a style, upload a pet or face, and get a die-cut sticker with a bold white border for chat packs and print.

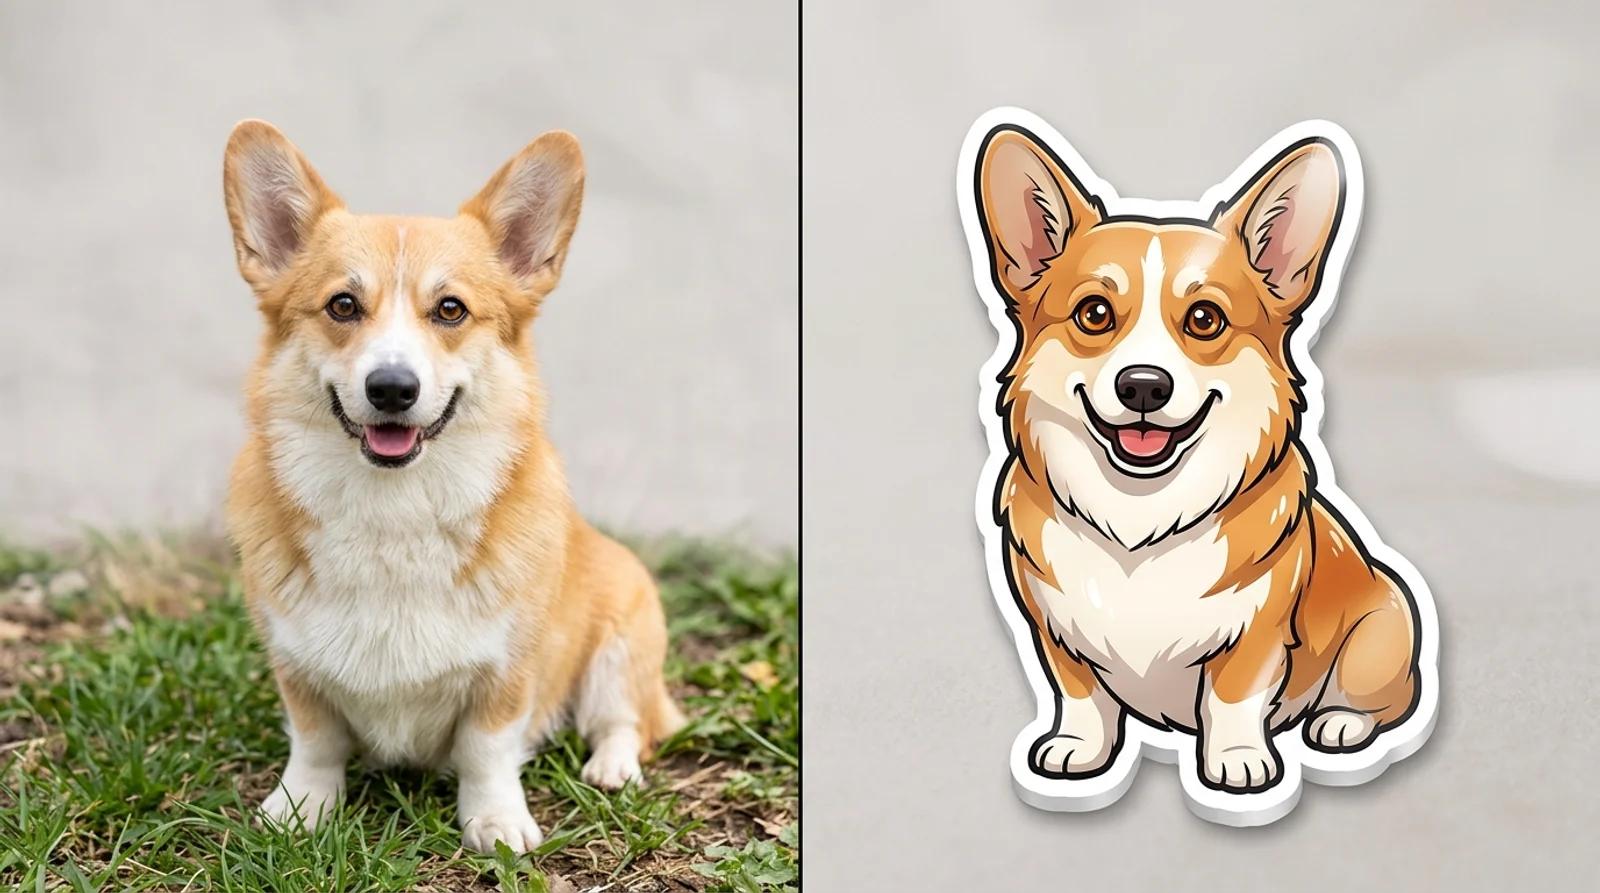
Stickers used to mean a designer, a vector file, and a wait. Now you can turn a photo into a sticker with free AI in a few seconds: a corgi photo on your phone becomes a glossy die-cut sticker, and you can build a whole pack before your coffee gets cold. People put them on WhatsApp and Telegram, laptop lids, water bottles, small-shop merch, and the group chats that run on pet and face stickers.

This guide uses the AI sticker generator. Upload a photo of your pet or face, or describe a sticker from scratch, pick a style, and generate a die-cut design with a bold white border. No vector software, no tracing, no waiting on a designer.

A corgi photo on the left, the same dog as a glossy die-cut sticker with a white border on the right

What makes a good sticker

A sticker is not a tiny illustration. It has to read at the size of a chat bubble or a laptop hinge, so the rules differ from a normal image. The ones that work share three traits.

  • One bold subject. A single character or object, front and center. Three things competing in a busy scene turn to mush at thumbnail size.
  • A clean die-cut border. That thick white outline is what makes a sticker look like a sticker. It separates the subject from whatever it sits on and gives the eye a crisp edge.
  • Simple shapes. Strong colors, an obvious silhouette, one clear emotion. If you have to squint to read it at 64 pixels, it is too detailed.

Get those right and the rest is picking a style and a subject.

Step 1: Open the generator and choose how to start

Open the AI sticker generator. There are two ways in, and both land in the same place.

  • Upload a photo. Drop in your pet, your face, or an object. This is the route for "make my dog into a sticker" or a face sticker for a friend group.
  • Describe it instead. Skip the upload and type the subject, like a happy avocado giving a thumbs up or a sleepy cat curled up. This is the route when you have an idea but no photo.

You do not need both. Pick whichever fits.

Step 2: Pick a style

Choose one of four built-in styles. Each sets the whole look and adds the thick white border and a simple background for you, so you never write a prompt for any of that.

  • Kawaii. Soft, cute characters with big friendly expressions. The default for pet and reaction stickers.
  • Cartoon. Bold flat colors and clean comic-style outlines. Good for mascots and characters with attitude.
  • 3D. A shiny rendered look with soft studio reflections. Best for objects like hearts, rockets, and food.
  • Pixel. Crisp retro 8-bit sprites with a bold palette. The one for game-night packs.

Match the style to the subject and to where the sticker will live. A pixel sword fits a gaming Discord; a glossy 3D heart fits a couple's chat. Pick the look first, since it shapes everything after it.

A sticker sheet of six cute die-cut stickers on a pastel background

Step 3: Describe the subject (keep it short)

If you uploaded a photo, the style does the work and you can generate now. If you are describing one, the cleanest stickers come from the shortest briefs. Two rules.

  • One clear subject. A single character or object, not a scene. A friendly little robot waving beats a robot in a workshop surrounded by tools.
  • One emotion. Give it a single, obvious feeling, like happy, winking, or sleepy. That expression is what makes a sticker land in a chat.

For reaction stickers, add a short speech bubble, like a winking cat with a HELLO speech bubble. Keep it to a word or two so it stays readable when the sticker shrinks.

Step 4: Generate

Hit Make sticker. The model renders your subject in the chosen style with the die-cut white border and a plain background. It takes a few seconds.

When it lands, check it the way you would a logo. Does the subject read instantly at small size? Is the border clean all the way around? Is the emotion obvious? If something is off, regenerate. Each run varies a little, and the second or third pass often has a cleaner border or a stronger pose. Clicking again, changing nothing, is a real fix here.

Step 5: Build a matching pack

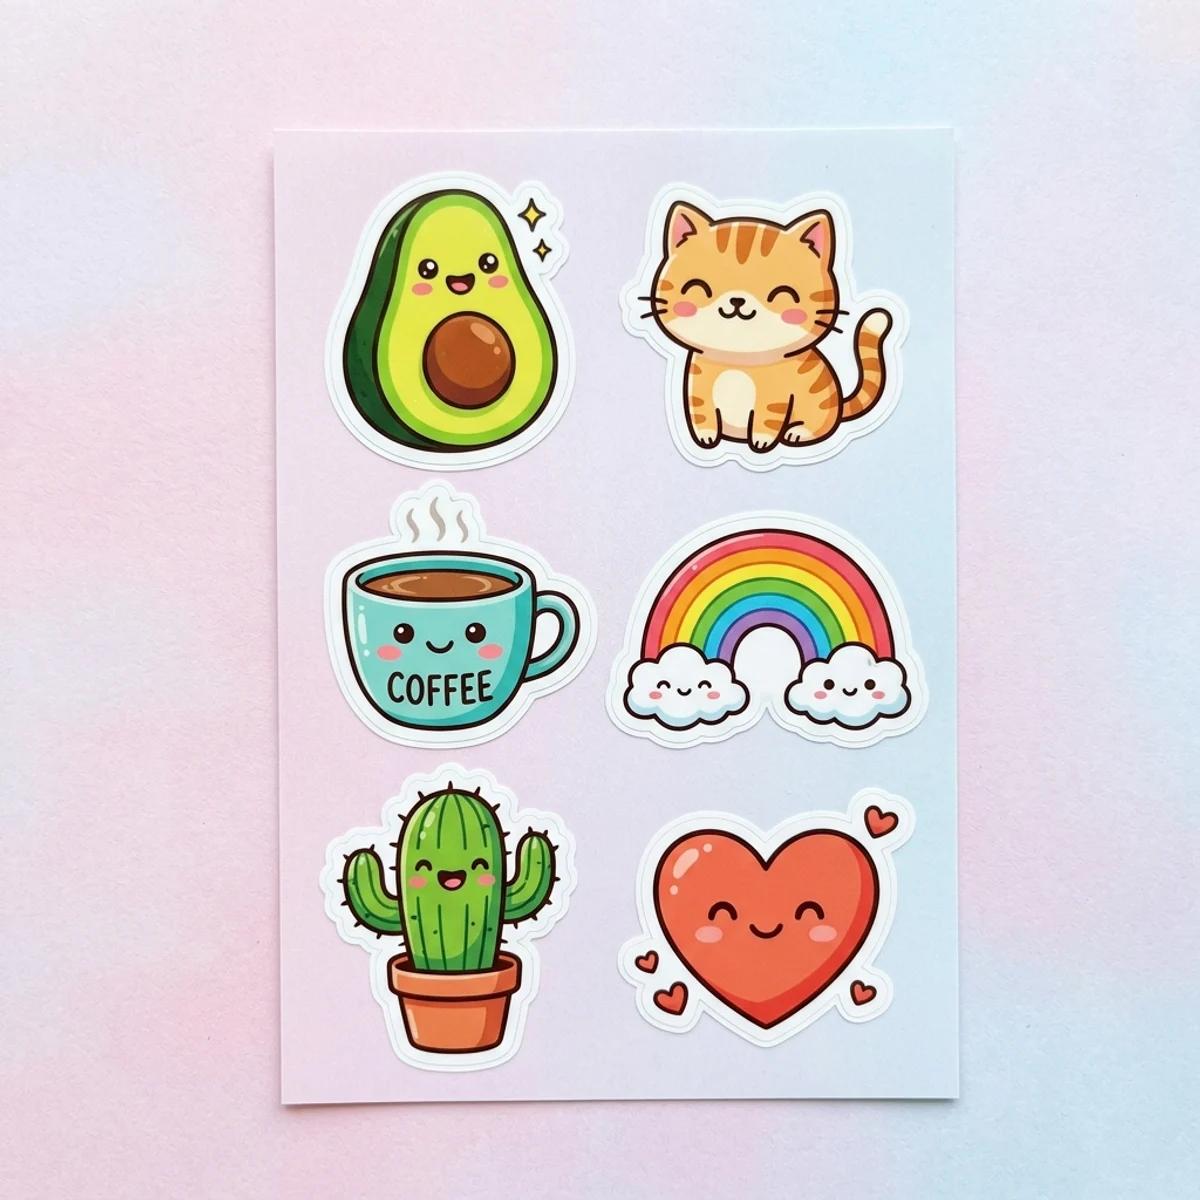
A single sticker is fine, but a pack is what people actually want. To make a set look like it belongs together, keep the same style across every prompt and hold a consistent character or theme. Run the same fox through kawaii once, then keep kawaii for the next five. The shared style is what ties them into a pack.

The same fox character as a sticker in four styles: kawaii, watercolor, comic, pixel

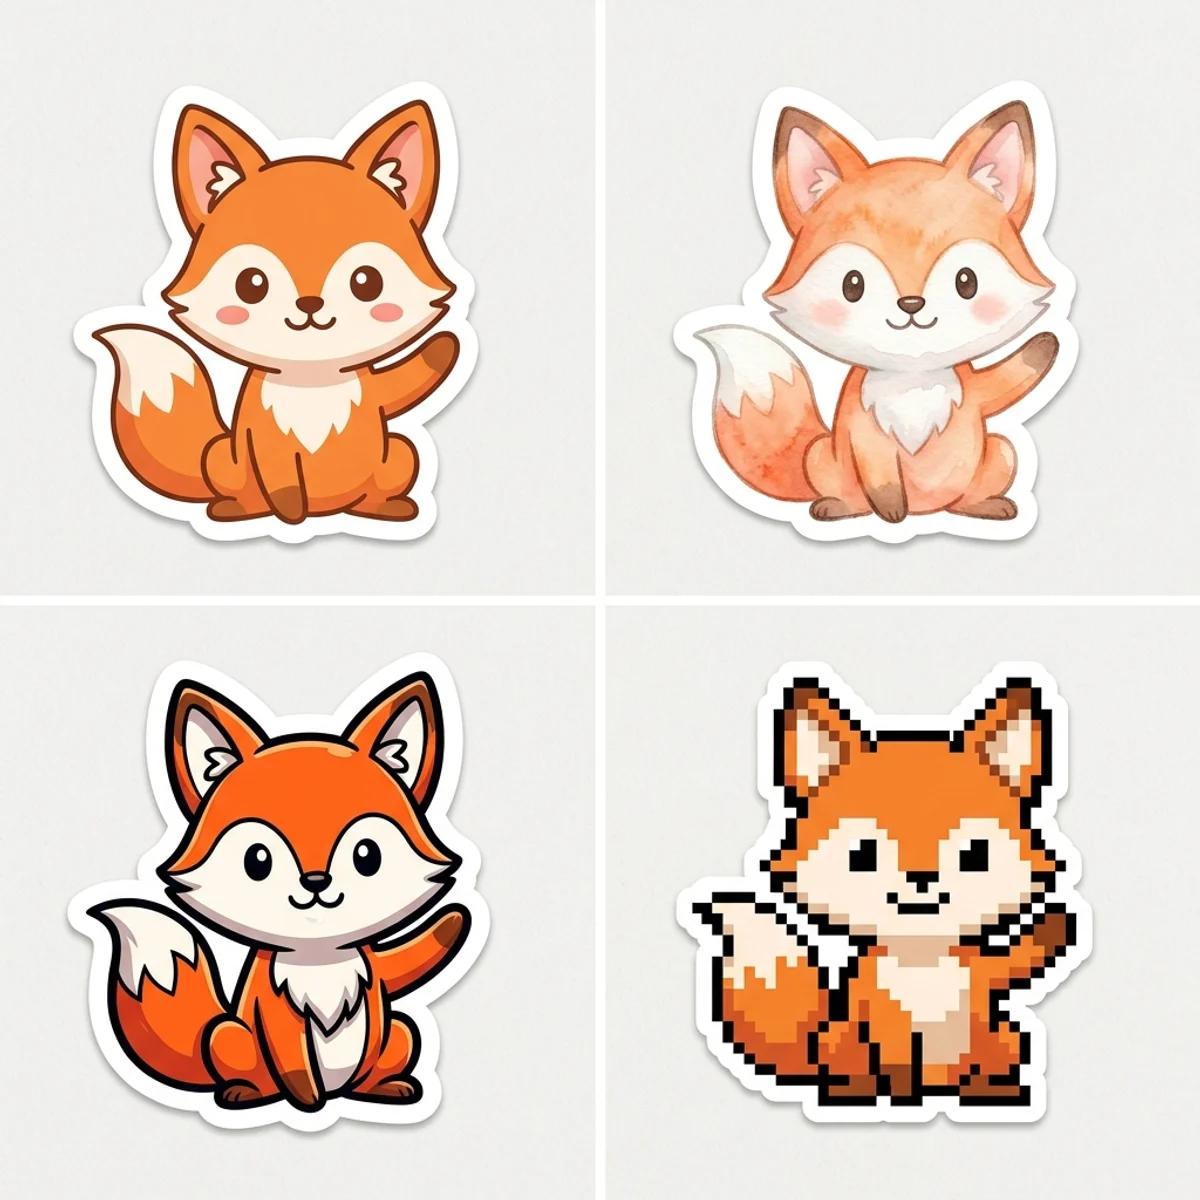
Seeing one character across styles is worth doing once. It shows how much the style alone changes the read, and it helps you commit to one before you build the rest.

Match the style and format to where it goes

Different destinations want different settings. Here is a quick map from use case to the style and format that fit.

Use caseBest styleFormat tip
Chat sticker pack (WhatsApp, Telegram)Kawaii or CartoonTransparent PNG, square, around 512×512
Laptop or merch print3D or CartoonKeep the white die-cut border, print at 300 DPI, 2 to 3 inches
Brand mascotCartoonOne consistent character, transparent PNG so it sits on any color

Chat apps want square transparent PNGs that drop into a bubble. Print wants the white border and real resolution. Decide the destination before you finalize and the format choices follow.

Turn a sticker into something you can use

The generated sticker comes on a plain background with a white border. For most chat and print uses you will want a true cutout, which is one extra step.

  • Make a transparent PNG. The generated background is plain but not transparent. To get a clean cutout that sits on any color, remove the background in an editor (or with a background remover) and export as PNG. PNG keeps the transparency; save as JPG and the transparent areas fill with white.
  • Size for chat vs print. Chat apps like WhatsApp and Telegram want small square PNGs, with 512×512 the common target. Print wants the opposite: a high-resolution file at roughly 300 DPI so the edges stay crisp at physical size. Upscale the winner before printing instead of stretching a small file.
  • Order printed stickers. Treat the AI result as a draft. Before sending it to a print-on-demand service, check the resolution, keep the white die-cut border, and add cut lines in your print workflow. Most printers want a PNG with a clear margin around the subject.

How to get a clean cutout

If the border looks messy or the subject blends into the edge, the fix is almost always in the source, not the settings.

  • Start with a clear subject. When you upload, use a photo where your pet or face stands out from the background. A corgi against a plain wall cuts cleaner than a corgi in tall grass.
  • Prefer a simple background. A busy or same-colored background gives the model less to separate the subject from, and the die-cut edge suffers.
  • Lean on bold styles. Kawaii, cartoon, and 3D produce stronger silhouettes than fine, detailed looks, so the border holds up at small size.
  • Regenerate. If one pass has a ragged outline, run it again. A second or third result often has the tidy edge you want.

Free, and what signing in adds

You can pick a style, upload or describe a subject, and generate a sticker on the free base model without an account. Signing in keeps your results in history so you can come back and build out a pack over time, and it removes the export watermark from the download.

A quick checklist before you publish a pack

  • Each sticker is one clear subject with one obvious emotion
  • The whole pack shares a single style
  • The die-cut white border is clean all the way around
  • You exported transparent PNGs for chat use
  • Print files are high-resolution with room around the subject
  • You avoided copyrighted characters and trademarks for anything you sell

Make your first sticker

You do not need a designer or vector software for this. Pick a style, upload your pet or face (or describe it), generate, and regenerate until the border is crisp. Keep the style consistent and you have a pack.

Try the free sticker generator →

All Posts

Author

avatar for Inkfox AI
Inkfox AI

Categories

  • Guides
What makes a good stickerStep 1: Open the generator and choose how to startStep 2: Pick a styleStep 3: Describe the subject (keep it short)Step 4: GenerateStep 5: Build a matching packMatch the style and format to where it goesTurn a sticker into something you can useHow to get a clean cutoutFree, and what signing in addsA quick checklist before you publish a packMake your first sticker

More Posts

How to Make Custom Coloring Pages With AI (Free Printable Pages for Kids)

How to Make Custom Coloring Pages With AI (Free Printable Pages for Kids)

Make custom coloring pages with AI from a text prompt or a photo. Get clean, free printable black-and-white line art for kids and classrooms.

avatar for Inkfox AI
Inkfox AI
2026/06/09
How to Remove a Watermark From a Photo for Free (AI, No Photoshop)

How to Remove a Watermark From a Photo for Free (AI, No Photoshop)

Remove a watermark from a photo for free with AI. Clear stock marks, logos, signatures, and date stamps in one click, no Photoshop needed.

avatar for Inkfox AI
Inkfox AI
2026/06/09
How to Change the Background of a Photo Online for Free (AI Background Changer)

How to Change the Background of a Photo Online for Free (AI Background Changer)

Change the background of a photo online free with AI. Swap a messy backdrop for a clean studio one on product shots, portraits, and listings.

avatar for Inkfox AI
Inkfox AI
2026/06/09

Newsletter

Join the community

Subscribe to our newsletter for the latest news and updates

Inkfox AI logoInkfox AIInkfoxAI

Free Unlimited AI Image Generator — no sign-up required.

Inkfox AI is a free AI image and video generator for text to image, image-to-image editing, reference image creation, background removal, image upscaling, text-to-video, image-to-video, and multi-model visual generation.

Company
  • About
  • Contact
  • Transparency
  • Status
Legal
  • Cookie Policy
  • Privacy Policy
  • Terms of Service
© 2026 Inkfox AI. All Rights Reserved.Sitemap