
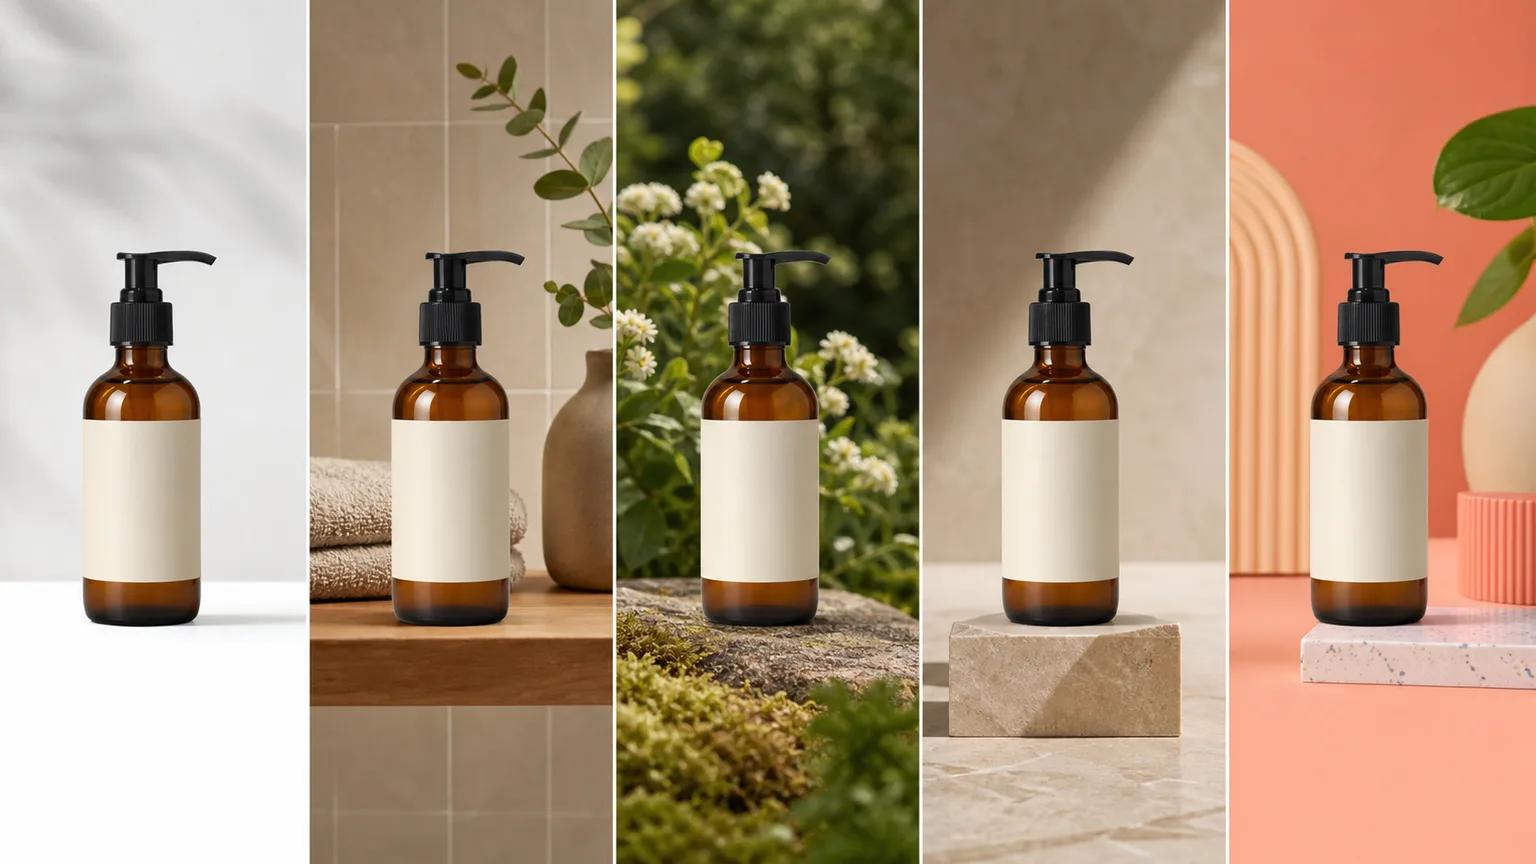
How to Turn One Product Photo Into Five Consistent Scenes
Build a five-scene ecommerce image set from one product photo with a shot list, prompt matrix, consistency checks, and practical export checklist.

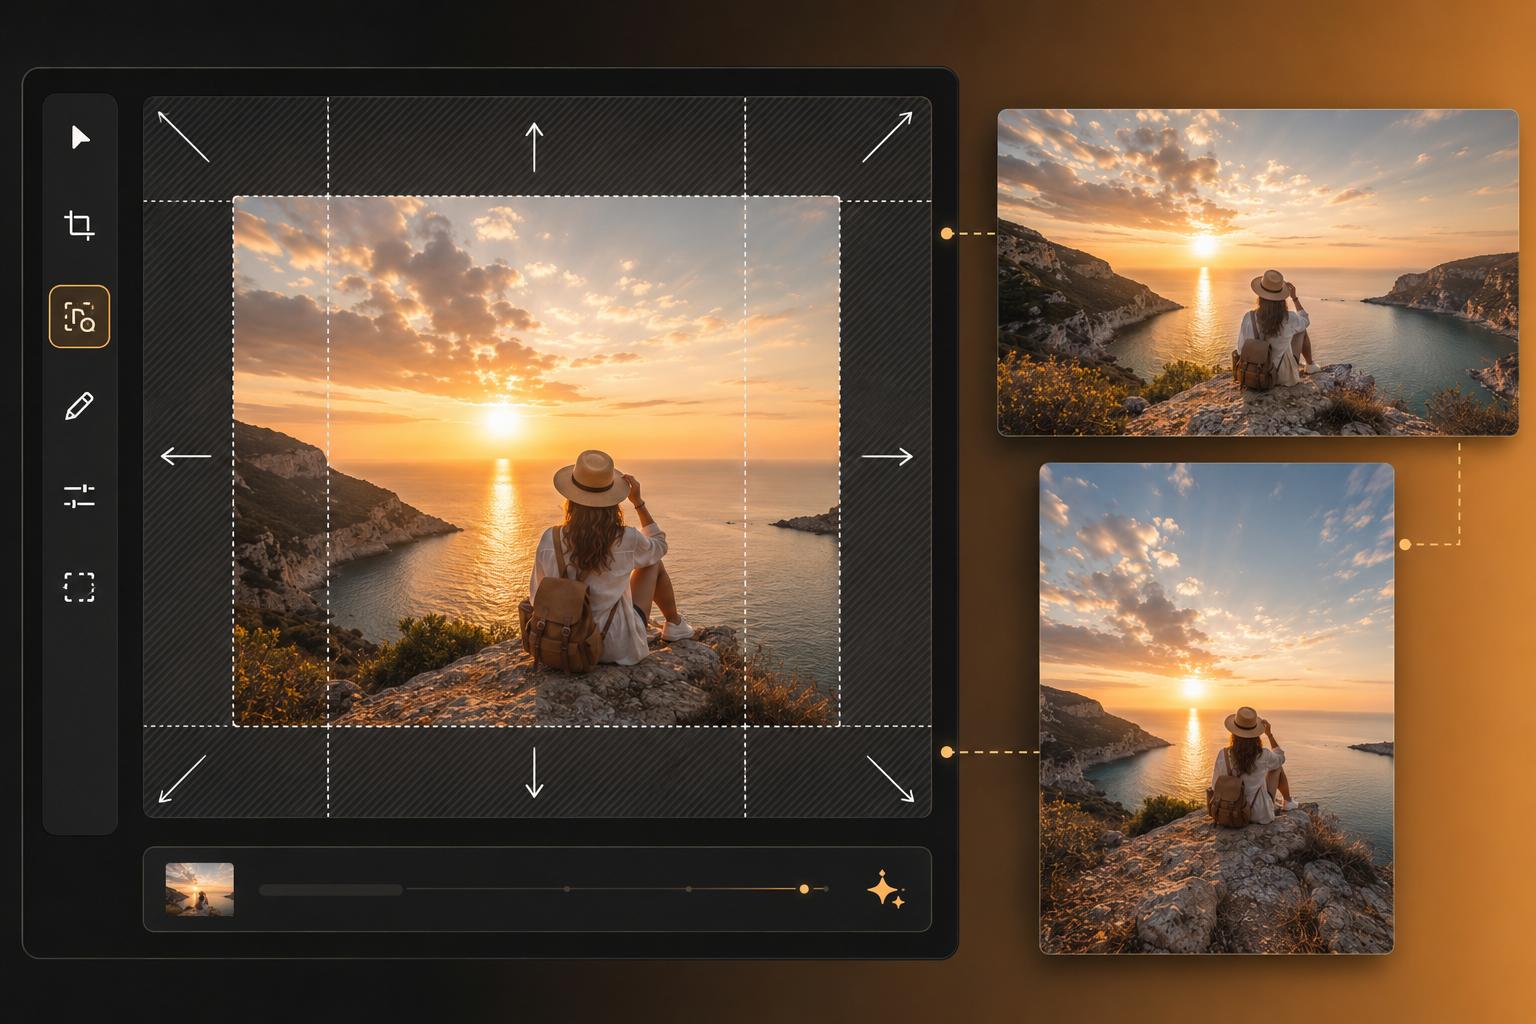
Learn how to extend an image with AI using outpainting, smart aspect ratios, and prompt templates. A practical workflow for creators, sellers, and marketers using Inkfox AI.
You finally captured the perfect shot: the product, the model, the mood. Then the brief lands: "We need this as a wide banner, a square post, and a vertical story." Suddenly the photo is too tight, awkwardly cropped, or missing the breathing room a headline needs. Reshooting is expensive. Cropping loses the story. This is where learning how to extend an image with AI changes the workflow.
This guide walks through outpainting, aspect ratio strategy, prompt templates, a quality checklist, and a repeatable workflow inside Inkfox AI so one strong image can become a full campaign set.
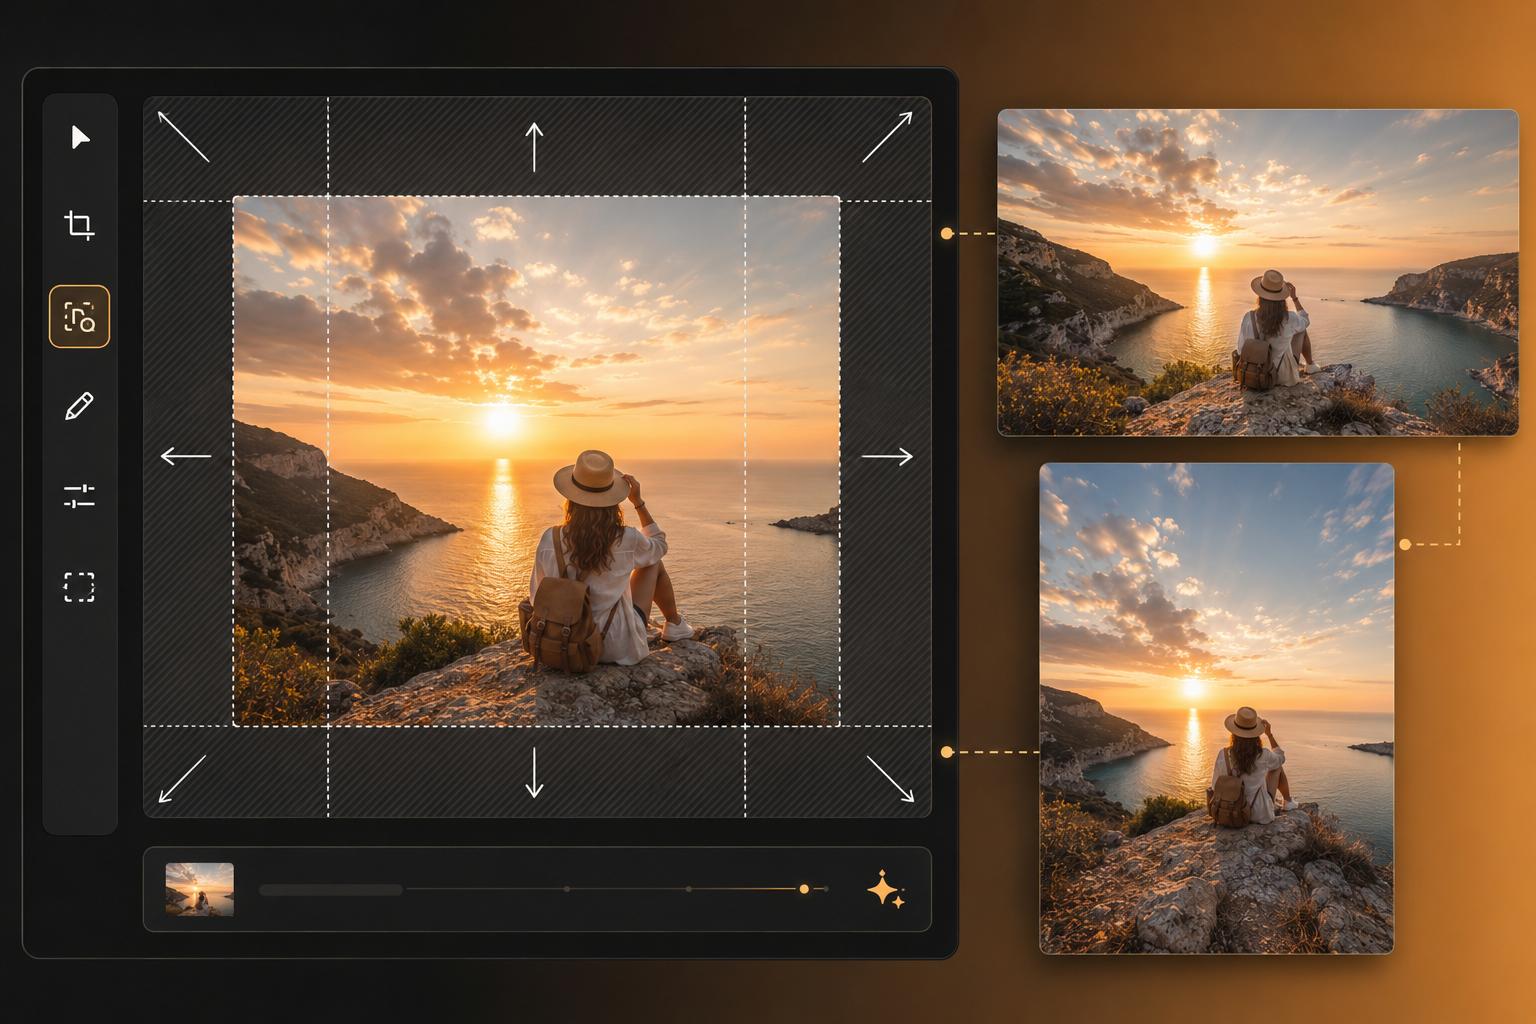
Extending an image, often called outpainting or uncropping, means generating new, believable pixels beyond the original frame. Instead of cropping inward to fit a new size, you push the canvas outward and let an AI model create what would plausibly exist there: more sky, more floor, more wall, more product-table surface, or more background texture.
It is the opposite of inpainting, which fills a missing area inside the image. Outpainting fills the space around it.
AI image extension is useful, but it is not the right tool for every asset. Use this decision rule before generating.
The goal is not to use AI for everything. The goal is to avoid wasting time when AI extension is genuinely the best production step.
Great outpainting starts before the upload. Decide the final ratio first, then extend intentionally.
| Ratio | Common use | Extension strategy |
|---|---|---|
| 1:1 | Product grids, thumbnails, feed posts | Keep the subject centered and avoid busy edges |
| 4:5 | Instagram feed, paid social, ecommerce hero cards | Add vertical room while keeping subject scale strong |
| 9:16 | Reels, TikTok, Stories, Shorts | Add top and bottom space, often with headline room above |
| 16:9 | YouTube thumbnails, hero banners, presentations | Extend left and right, then choose a copy-safe side |
| 3:1 or 4:1 | Email headers, website strips, profile banners | Extend heavily to one side and keep the subject off-center |
Before opening the AI Image Extender, ask: which edges need new pixels?
This one habit saves more time than any prompt trick because it keeps the final layout in mind from the start.
Outpainting prompts are different from text-to-image prompts. You are not asking for a new scene. You are asking for a continuation of the existing image. Keep prompts short, physical, and consistent with what is already visible.
Continue the same matte stone surface and warm gray background. Match the soft studio light from the upper left. Keep the product unchanged. No new objects, no text, no logos.
Extend the scene naturally with more pale sky, distant trees, and soft pavement. Same time of day, same lens feel, same warm shadows. No extra people, no signs, no text.
Extend the background only. Keep the same soft gradient and shallow depth of field. Add clean negative space on the right for ad copy. Do not alter the face, hair, clothing, or hands.
Continue the wooden floor and off-white wall. Maintain the same window light direction and perspective. No new furniture, no artwork, no clutter.
Here is the repeatable workflow to use when extending images with Inkfox.
Start with the highest-resolution version you have. If the source is small or soft, run it through the AI Image Upscaler first. Extending a blurry image usually creates a larger blurry image.
Choose a source where the subject is clear, the lighting is stable, and the important edges are not already damaged.
If the original background is distracting and you want a cleaner campaign asset, use the AI Background Remover first. Place the subject on a clean base, then extend from that simpler composition. Clean input usually gives the model fewer chances to invent odd details.
Go to the AI Image Extender, upload the image, and set the target frame. Position the original image inside the new canvas so the subject lands where it should appear in the final layout.
This positioning step matters. The tool can extend the image, but you decide the composition.
Use one of the templates above. Keep it under two sentences. Focus on surface, lighting, background texture, and what should not appear.
Generate a few options. Look for the version where the transition between original and extension is hardest to spot. Matching grain, light direction, texture, and perspective is more important than dramatic scenery.
If one extension is close but a corner feels wrong, move the result into Image to Image and refine that area with a targeted prompt. This is often faster than regenerating the entire canvas.
Repeat the extension step for every target ratio. Because each version starts from the same source, your campaign stays visually consistent across feed, story, banner, thumbnail, and landing page placements.
Before an extended image goes on a storefront, ad, blog, or social feed, inspect it carefully.
If one of these checks fails, regenerate with a tighter prompt rather than trying to hide the problem later.
Turn one clean product photo into a full listing set: square grid image, 4:5 product hero, 16:9 storefront banner, and 9:16 video cover. The product stays consistent while the frame changes for each channel.
Take one shoot and create format-native assets for Instagram, TikTok, YouTube, LinkedIn, and email. Instead of forcing one crop everywhere, each platform gets a composition that fits.
Extend older brand photography into modern ratios without booking a new shoot. This is useful for landing page refreshes, launch graphics, and quick campaign tests.
Fix a strong phone photo that was shot in the wrong orientation. A vertical portrait can become a wide thumbnail, or a tight landscape can gain enough top space for a story cover.
Learning how to extend an image with AI is not just about filling empty space. It changes how you treat source photography. A good image becomes a starter frame that can adapt to multiple placements without losing the core subject.
Start with a clear target ratio, position the source image intentionally, write a short continuation prompt, and inspect the result before exporting. Then use the rest of the Inkfox workflow: image-to-image for refinement, AI upscaling for final candidates, and background removal when you need reusable cutouts.
Open a strong recent photo in the AI Image Extender, pick a ratio it was not shot for, and build the next campaign format from the same visual idea.
Build a five-scene ecommerce image set from one product photo with a shot list, prompt matrix, consistency checks, and practical export checklist.
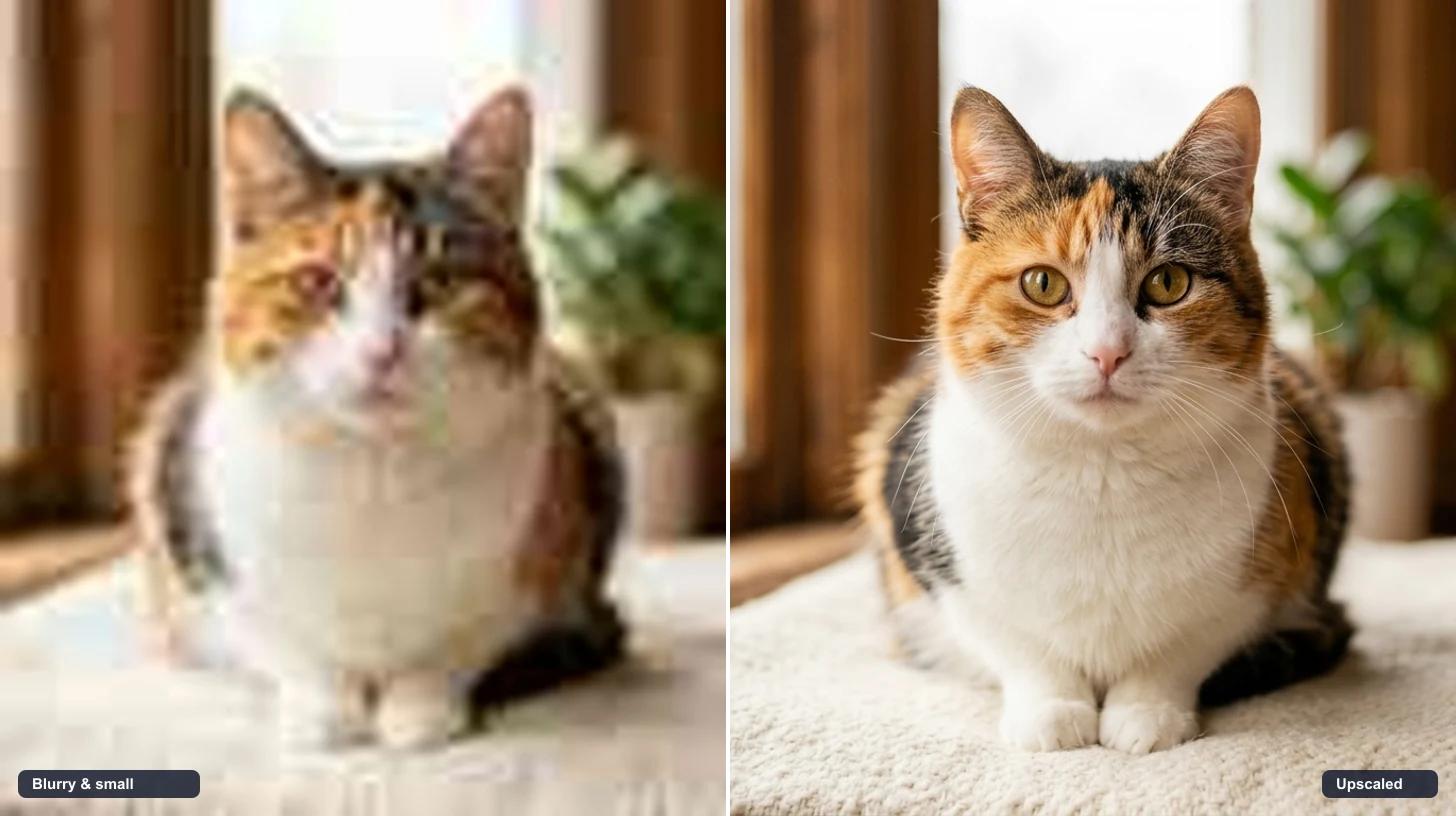
A practical guide to upscale an image with AI for free. Make blurry, pixelated, or compressed photos look sharp and high-resolution for product pages, prints, and social.
An honest comparison of the best AI video generators in 2026, including Veo 3.1, Kling 3.0, Runway, Wan 2.7, and Hailuo 2.3, with guidance on which model to use for product, portrait, social, and cinematic clips inside Inkfox AI.
Newsletter
Subscribe to our newsletter for the latest news and updates