")
How to Upscale an Image With AI (Make Blurry, Small Photos Clear for Free)
A practical guide to upscale an image with AI for free. Make blurry, pixelated, or compressed photos look sharp and high-resolution for product pages, prints, and social.
")
A practical guide to redesign a room with AI for free. Upload a photo and see your space restyled with new furniture, decor, and lighting before you spend a dollar.
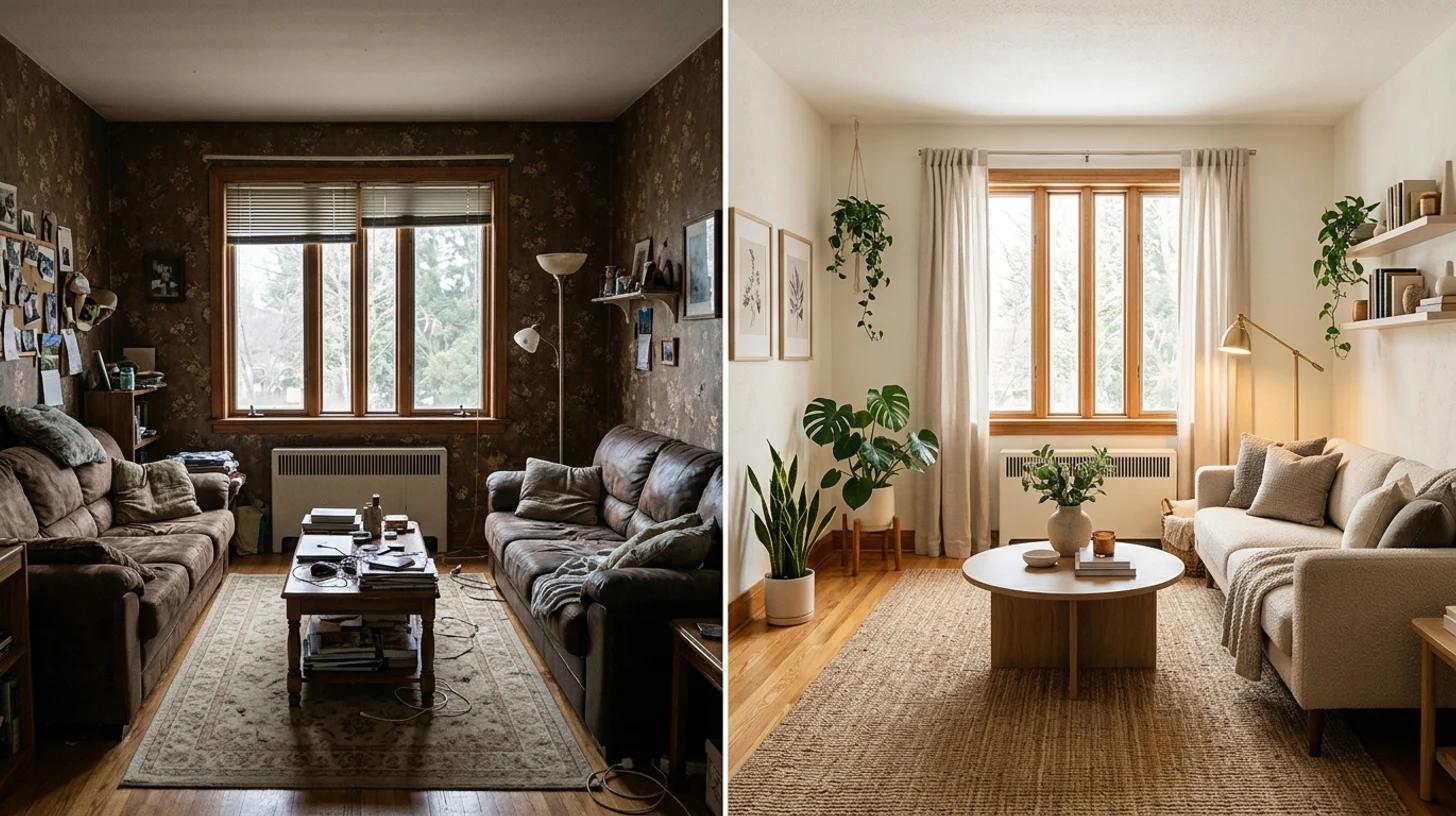
You know the room doesn't work, but you can't picture what would. The sofa's tired, the layout feels off, the whole space reads dated, and every idea you have stays trapped as a vague feeling you can't quite describe to anyone. Furniture is expensive and hard to return. Paint is a weekend you don't get back. So the room stays exactly as it is, because committing to a change you can't see first feels like a gamble.
That's where an AI room makeover earns its place. You upload a photo of the actual room, and the AI restyles it with new furniture, decor, and lighting while keeping your real walls, windows, and layout in place. In a few seconds you're looking at your own space, redesigned, instead of guessing from a showroom photo that has nothing to do with your floor plan. This guide walks through how to use it to make real decisions, not just pretty pictures.
Set expectations first, because that's the difference between a useful planning tool and a disappointing one.
What it does well:
What it can't do is function as a construction document. The results are inspiration, not a technical plan. Exact furniture dimensions, the real color of a paint chip, whether a sofa actually fits through your door, what's structurally possible behind a wall, none of that is something a styled photo can promise. Use it to choose a direction and to communicate it. Verify the specifics, measurements, finishes, and budgets, independently before you buy or build.
The honest framing: AI interior design helps you decide what you want. It doesn't replace the measuring tape, the contractor, or the return policy.
The result is only as good as the room photo you feed it. A couple of minutes here changes everything downstream.

Upload a JPG, PNG, or WebP up to 10 MB. Use the highest-resolution photo you have for the sharpest result.
Open the AI room makeover tool and upload your room photo. The one-click preset applies a modern, cozy restyle, so you can see the tool's take on your space before you start steering it.
Click to make over the room. The AI reads your photo, locks the layout, walls, windows, and camera angle in place, then swaps the dated or mismatched furniture for coordinated pieces, adds plants and tasteful decor, and relights the scene so it reads like a real interior photo rather than a render. A few seconds later you're looking at your room, restyled.
This first pass is the fastest way to find out whether you and the AI are even on the same page. Often it surfaces something you hadn't considered, a different sofa placement, a warmer palette, that becomes the thing you actually chase.
The one-click preset is a starting point. The real value shows up when you open the full workbench and describe the look you want. The architecture still stays put, but now you control the mood.
Some directions worth trying on the same room so you can compare:
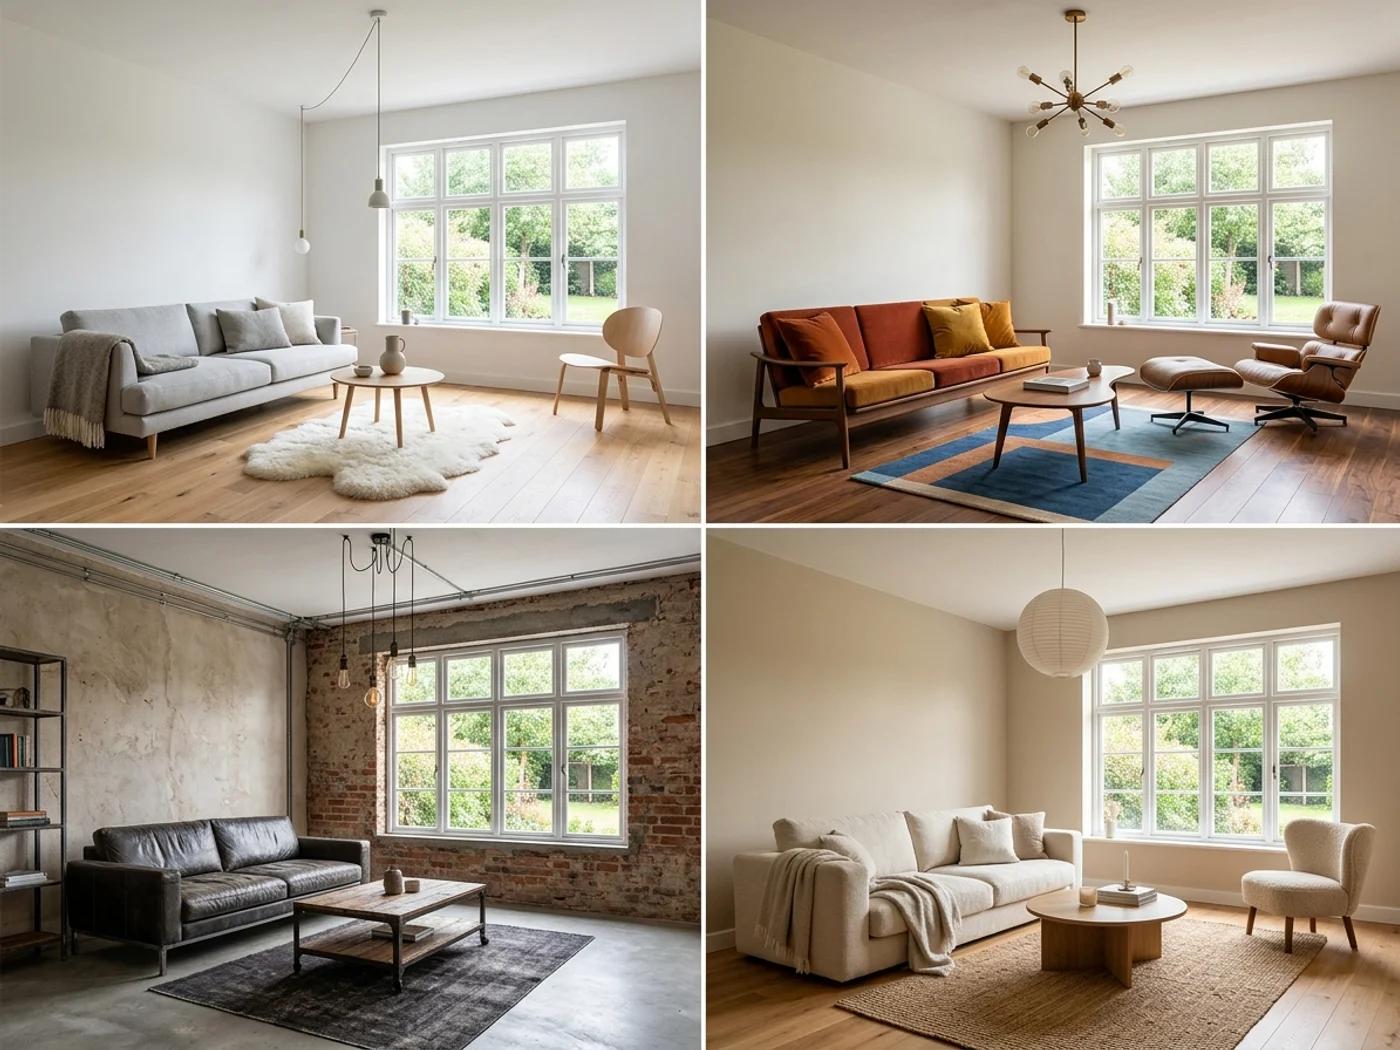
Running the same room through three or four styles back to back is the whole point. Seeing your space in each one tells you more in two minutes than weeks of saving images from other people's homes, because it's your room every time.
The same tool solves different problems depending on where you're standing.
| You are | How it helps |
|---|---|
| Redecorating your own place | See a new layout or style in your existing room before buying a single piece of furniture. |
| Renting and stuck with it | Picture how a bland or empty rental could look furnished, and find low-commitment changes that work. |
| Selling or staging | Generate virtual staging photos for a listing without hiring a stager or renting furniture. |
| A realtor | Show buyers the potential of an empty or dated space directly in the listing photos. |
| Briefing a designer or contractor | Hand over a concrete visual reference instead of trying to describe a feeling in words. |
That last one is underrated. The hardest part of working with an interior designer or contractor is communicating what you want. A styled photo of your own room is a far better brief than "something cozy but modern."
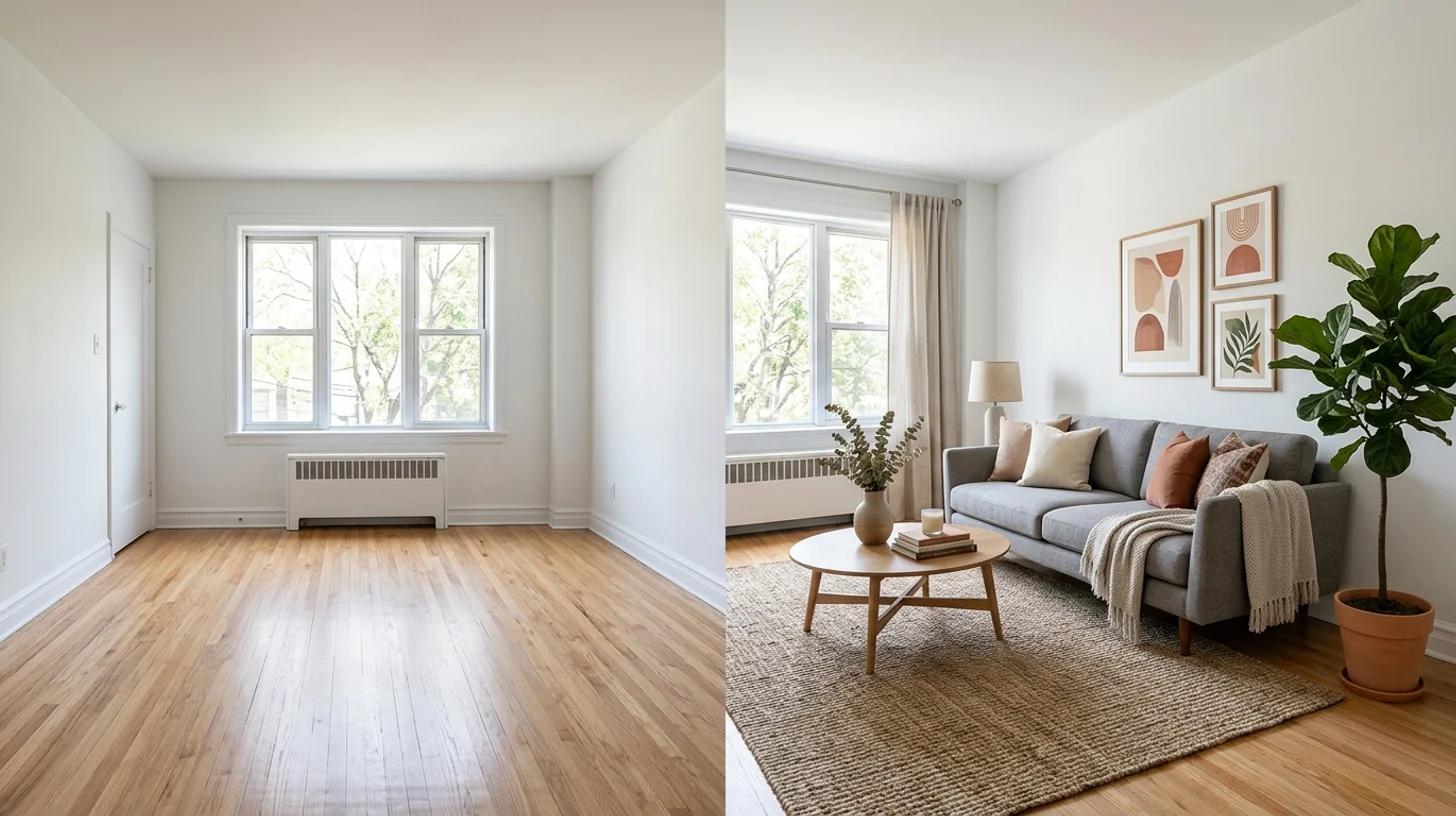
An empty space is the hardest thing to picture, which is exactly where this helps most. Upload the bare room and the AI furnishes it, so a blank rental or a cleared-out listing comes back fully styled and lived-in.
For renters and sellers, that's the difference between a prospect walking through an empty box and seeing a home they could move into. Keep in mind the staged furniture is a suggestion, not an inventory list, but as a way to show potential, it does the job a stack of furniture catalogs can't.
A few habits separate a useful makeover from a pretty but useless one:
The room was never the problem. Not being able to picture the fix was. Take a clean, straight-on photo, let the AI restyle your actual space, compare a few directions, and use the one you love as a real plan, not a guess. Then go measure twice and buy once.
A practical guide to upscale an image with AI for free. Make blurry, pixelated, or compressed photos look sharp and high-resolution for product pages, prints, and social.
")
How to turn a phone selfie into a professional headshot for LinkedIn, resumes, and team pages with free AI: which selfie to use, how to pick a style, and how to check the result still looks like you.
")
A practical guide to turn a photo into anime with AI for free. Learn the photo-to-anime steps, which style to pick, and how to keep your likeness.
Newsletter
Subscribe to our newsletter for the latest news and updates