How to Turn One Product Photo Into Five Consistent Scenes
Build a five-scene ecommerce image set from one product photo with a shot list, prompt matrix, consistency checks, and practical export checklist.
A single clean product photo can become a useful campaign set, but only if the product still looks like the product. The goal is not five unrelated AI concepts. It is one recognizable item photographed in five settings, each with a specific job.
This workflow starts with an approved source image, turns the campaign into a shot list, and uses image to image to change the scene while protecting the product. It is designed for small ecommerce teams that need variety without reshooting every channel.
Before prompting, write a short identity lock. Record the details a customer uses to recognize the item:
silhouette and proportions;
material, finish, and exact color;
cap, pump, handle, or hardware shape;
label position and package layout;
distinctive seams, buttons, or texture;
the approved camera angle.
If small label copy must be legible, treat the AI output as a scene plate and composite the approved packaging artwork afterward. Do not accept invented ingredients, certifications, or distorted brand text just because the overall scene looks attractive.
Use the highest-quality source you have. Shopify's official product-photography guide recommends a tripod, consistent setup, and evenly lit images; those same habits give an image model a cleaner anchor.
Choose a front three-quarter or straight-on image that you can keep across the set. The full product should be visible, in focus, and separated from the background. Avoid a source with clipped corners, deep glare over the label, or props covering the shape.
Run this preflight before generation:
Check
Pass condition
Fix before continuing
Geometry
Product is not tilted or distorted
Reshoot level or choose another frame
Edges
Outline is sharp at 100% zoom
Use a sharper source; do not rely on upscaling
Color
Product matches the approved reference
Correct white balance first
Branding
Label and hardware are unobstructed
Use a cleaner angle or make an approved overlay
Resolution
Enough pixels for the intended crop
Start from the original file, not a screenshot
Need a reusable cutout first? Make one with the background remover, then keep both the cutout and original photo in your review folder.
Do not begin with five aesthetic adjectives. Begin with five placements. Google Merchant Center separates the primary product image from lifestyle images, which are intended to show products in a natural, real-world context. That is a useful way to divide a practical image set.
Scene
Business job
Composition
Background direction
1. Catalog anchor
Product page or listing
Square, centered, product fills frame
Clean white or light neutral sweep
2. Usage context
Explain where it belongs
4:5, eye-level, restrained props
Believable room or workspace
3. Ingredient or material story
Communicate sensory cues
4:5 close-medium view
Relevant natural materials, no false claims
4. Premium hero
Landing page or email header
Wide, negative space for live text
Pedestal, controlled directional light
5. Social variation
Stop the scroll without changing identity
9:16 or 4:5, stronger color
Simple graphic set with one accent prop
The catalog anchor remains the truth reference. The other four can become more expressive, but none should alter the product itself.
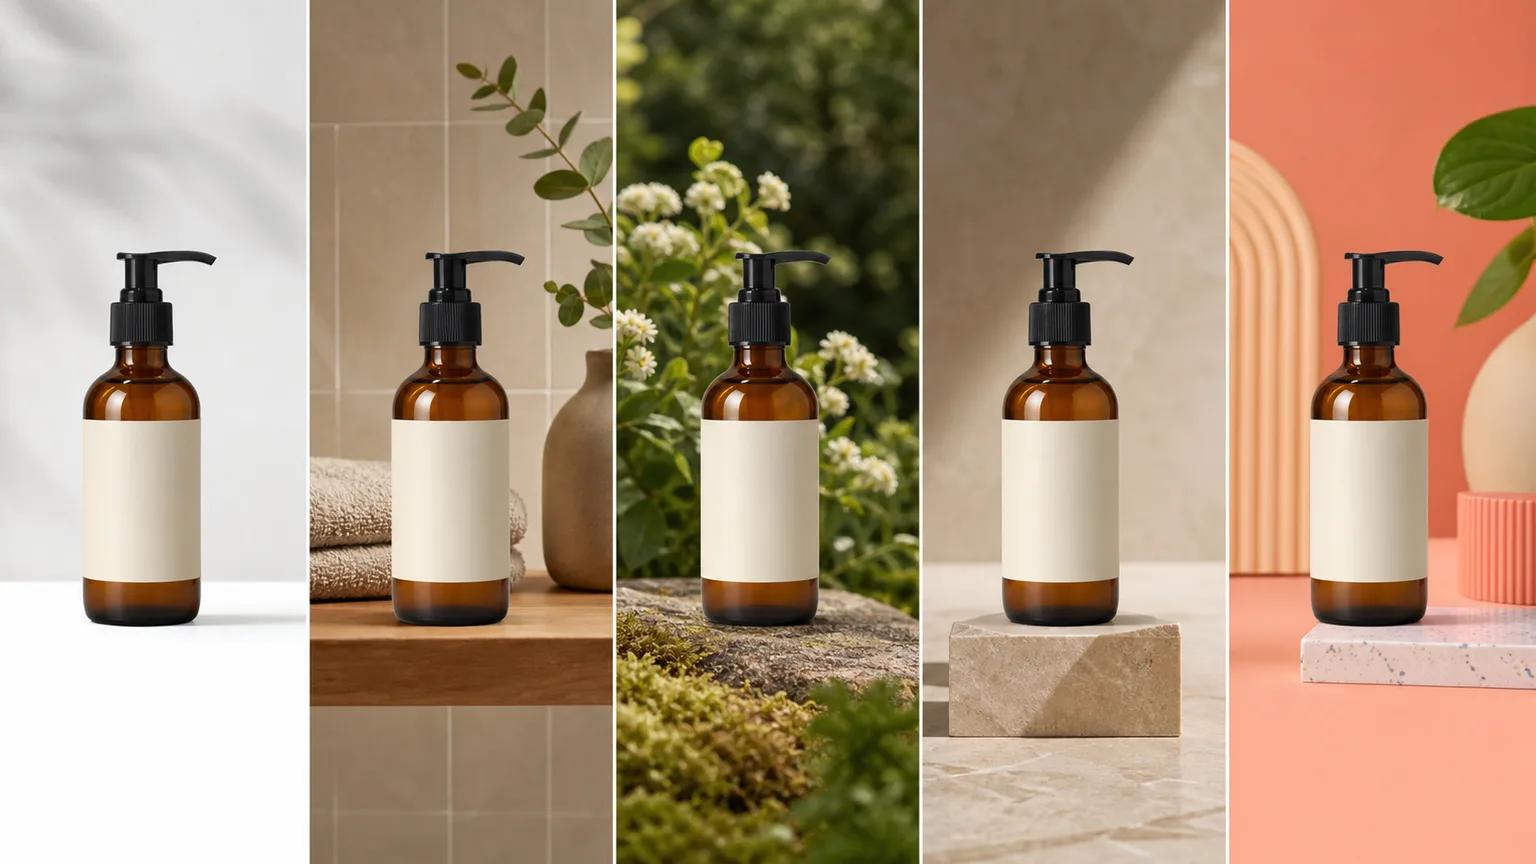
Open image to image, upload the master photo, and generate one scene at a time. Keep the identity-lock sentence unchanged; vary only the scene, lighting, and crop.
Use this structure:
Preserve the exact product from the reference: same silhouette, dimensions, amber glass, black pump, cream label placement, and three-quarter camera angle. Place it in [scene]. Use [lighting]. Frame for [channel and ratio]. Keep the product fully visible. No label changes, extra products, hands, floating objects, or text.
Scene
Scene phrase
Lighting phrase
Crop instruction
Catalog
seamless light-gray studio sweep
large softbox from camera left, gentle grounding shadow
centered 1:1, 10% safe margin
Bathroom
warm limestone vanity, folded neutral towel
soft morning window light from left
4:5, eye level
Botanical
stone ledge with restrained green foliage
diffused outdoor daylight
4:5, product dominant
Premium
honed stone pedestal, uncluttered beige set
controlled side light and soft falloff
16:9, negative space on right
Social
coral tabletop with one simple geometric prop
crisp soft studio light
9:16, safe area around product
Generate two or three candidates per scene before changing the prompt. This makes it easier to tell whether a defect is random or caused by the instruction.
Do not approve each image in isolation. Put all five beside the original at the same product height. Check them in this order:
Silhouette: compare the outer contour, cap, pump, and base.
Proportions: confirm width-to-height and component sizes.
Color: compare the product, not the changing background.
Package details: inspect label boundaries, closures, and seams.
Light logic: check that highlights and shadows agree with each scene.
Use a simple scorecard:
Criterion
0
1
2
Product identity
Different product
Minor drift
Matches source
Scene realism
Impossible or pasted-on
Plausible with flaw
Believable
Channel fit
Wrong crop/job
Usable after edit
Ready for placement
Brand fit
Off-brand
Neutral
Clearly on-brief
Reject any candidate that scores 0 for product identity, even if its total is high. A beautiful image of the wrong package is not a usable product asset.
Google's main product-image requirements prohibit promotional overlays, borders, and placeholders in the submitted primary image. Keep campaign text in the page or ad layout rather than baking it into the catalog master. Google also allows additional images to show different angles or staging, as described in its additional-image guidance.
For your own store, export the dimensions your theme actually displays. Shopify documents product-media limits and notes that 2048 × 2048 pixels usually displays best for square product images. Compress photographic assets rather than uploading the generator's largest draft unchanged.
Product identity matches the approved master in all five images.
Primary listing image contains no promotional text, border, or watermark.
Crops match the actual placements, including mobile safe areas.
Colors remain credible on a second display or phone.
Filenames describe product, scene, and ratio.
Informative images receive useful alt text; W3C's image decision tree explains when alt text is needed.
Only final candidates are sharpened or upscaled.
Approved source, prompt, model, and export are archived together.
If the selected frame is clean but too small, finish it with the image upscaler. If you need a new concept without a reference product, use text to image, but do not treat a text-only invention as an exact product photograph.
Save the prompt beside each selected output. When a campaign needs another ratio next month, you can reproduce the scene instead of reverse-engineering a finished JPG.
Choose one approved product photo, write the identity lock, and make the catalog anchor first. Once that image passes, create the other four scenes with the same lock and review them together.